Feature |
|
Cancel/Unset (If Applicable) |
Notes/Associated Buttons |
| Main Menu |
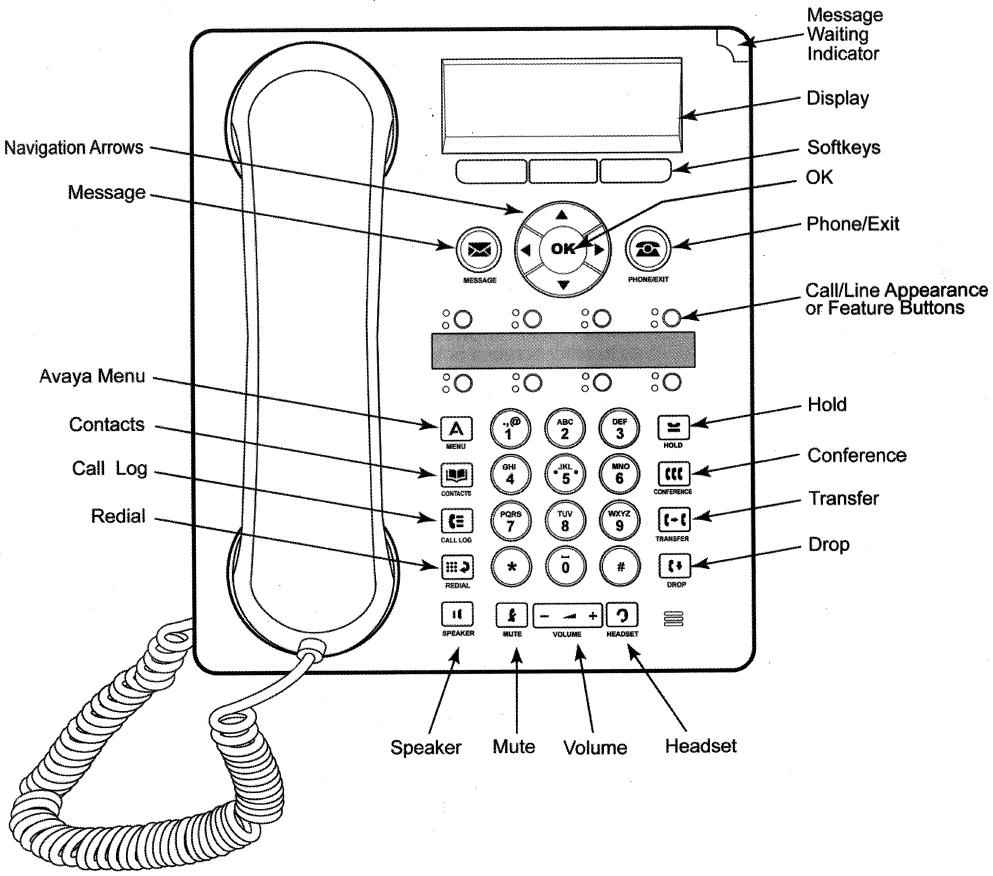
Press the Phone/Exit Button to get to the main screen. |
|
 (Phone Button) (Phone Button)
 (OK Button) (OK Button)
|
Forward calls: |
To set forwarding:
- Listen for dial tone.
- *2
- Enter extension to forward to.
- Listen for confirmation tone, hang up.
|
To cancel forwarding:
- Listen for dial tone.
- #22, listen for confirmation tone.
|
|
Transfer calls |
Use Transfer button:
- While in a call, press the Transfer Button.
- Dial the number which you would like to transfer to.
- Press the Transfer Button again to complete.
|
|
 (Transfer Button) (Transfer Button)
|
Call park/pickup |
Park:
- While in a call, press the Hold Button.
Pickup:
- #77 and then the extension used when parking call
|
 (Hold Button) (Hold Button)
|
Conference calls |
- While already in a call, press the Transfer Button.
- Dial the phone number you wish to add to your conference.
- Press the Conference Button to complete the call.
|
|
(Transfer Button)
 (Conference Button) (Conference Button)
You can accommodate 6 calls using one of these black IP phones.
If you need more than 6 callers, arrange a bridge call (up to 50 callers using bridge, see note 1 below) |
Send all calls
(usually to vm) |
The simplest way of setting/unsetting the Send All Calls function is to pick up the receiver and dial *8 to set, or #88 to unset.
- Push the Features softkey.
- Push the Up or Down arrow until you see the SendAllCalls softkey.
- Press the button.
- To turn off this feature, repeat step 1-3.
- The top right button on the programmed buttons above the number pad should also toggle Send All Calls.
|
To unset, select the same programmed button and note the indicator changes.
#88 to unset. |
|